This shall be the start of a series of C++ tutorials that I am going to put up here. I have always wanted to write something that is of some use here, but I have been ‘busy’ somehow. So, for these posts, the quality of the English language used shall be of acceptable standard, and to the best of my ability.
About C++, Eclipse, and Qt
Now, back to serious business here. If you have hit this page, you must have a bit of knowledge on what is C++ all about, and you should have heard of Eclipse IDE, or Qt UI Framework. I will skip all these explanations here. For people who are still at a loss, here are some websites for your reference:
- About C++ – http://en.wikipedia.org/wiki/C%2B%2B
- About Eclipse – http://www.eclipse.org/org/
- About Qt – http://qt.nokia.com/products
Integrated Development Environment (IDE)
Basically, Eclipse is an IDE. It aids you in the coding, referencing, and compiling of codes for your projects. It also supports various plugins that are freely available all over the internet. And more important, Eclipse is open-source, which means that anyone can download and use it freely.
Eclipse itself does not compile your codes. As I mentioned earlier, it is an aid. Therefore, you will need a compiler. For this, I will be using the minGW compiler, which, of course, is open-source. If you want to learn more about mingGW, here’s the website to go to: http://www.mingw.org/.
Download and Installation
Let’s start to get our hands dirty! In short, we will be downloading and setting up eclipse, Qt (open-source), Qt Eclipse Integration plugin, and minGW on our computer!
Downloading and Setting Up of Eclipse
For this tutorial, we will be downloading Eclipse Helios! Proceed to the following URL to download it: http://www.eclipse.org/downloads/. Look through the list of possible packages, and we will be able to find the one we are looking for – Eclipse IDE for C/C++ Developers. Click on the link that says “Windows 32 Bit”. And there you have it: a link to download Eclipse! Click on it, and save the zip file! Personally, I like to put all my downloaded stuffs on my desktop. It’s up to you where you want to save the file, just make sure that you can find it later.
Assuming that you have successfully downloaded the file, you should have a zip file, with the name “eclipse-cpp-helios-win32.zip”. Double click on the file. You will see a folder named “eclipse’. Copy it, and paste it in your c drive. This means that, you will have Eclipse in the following folder: “c:\eclipse”.
There you have it. Eclipse on your PC. Easy?
Downloading and Setting Up of Qt and MinGW
Click the following link to get to the page to download Qt: http://qt.nokia.com/downloads. Follow the page’s instructions to download. You should be downloading the Qt SDK for Windows, LGPL license, whose file name should be similar to the following: “qt-sdk-win-opensource-2010.04.exe”. At the page where you click on the SDK to download, there should have a small print which indicates the version of minGW that has been used to compile the SDK. A download link for that is also available. Click on that too. We need that compiler, in order for things to work properly later. The file name for that should be similar to the following: “MinGW-gcc440_1.zip”.
After the downloads are done, first, run the Qt SDK installer. Keep everything to their default values. Assuming that you have downloaded the 2010.04 version, Qt will be installed in the folder “c:\Qt\2010.04\”. After the Qt SDK installer has finished, double click on the mingGW file that you have downloaded. You should see a “mingw” folder in it. Copy it, and paste it in your c drive. This means that, you will have minGW in the following folder: “c:\mingw”.
If you reach here without much mishap, congratulations! You are halfway through!
Downloading and Setting up of Qt Eclipse Integration Plugin
The plugin is available at the following website: http://qt.nokia.com/developer/eclipse-integration/. Get the one for Win32. After downloading, run the installer. Follow through the instructions. The file name should be similar to the following: “qt-eclipse-integration-win32-1.6.1.exe”. You will be prompted to specify the directory for Eclipse and minGW. If you have followed the instructions above, you should be entering the following text into the respective text boxes:
- Eclipse – “c:\eclipse”
- minGW – “c:\mingw\bin”
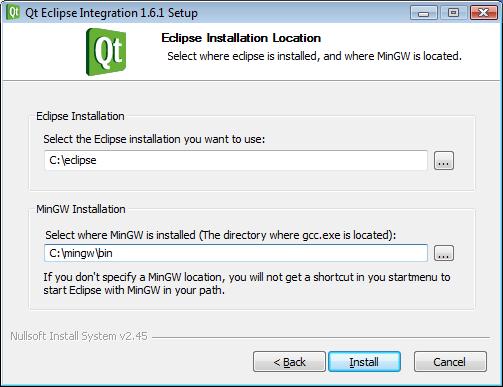
Complete the installation. That more or less completes the downloading and installation.
Executing and Configuring Eclipse with Qt
You have reached this stage without much mishap. Great!
Now, it is time to try running Eclipse! Go to “Start” –> “Programs” –> “Qt Eclipse Integration v1.6.1” –> “Start Eclipse with MinGW”. This will start Eclipse! To facilitate speed in starting this program, you can consider putting a shortcut on your desktop or in your start menu.
When running Eclipse for the first time, you will be prompted to select a workspace. A workspace is basically a folder where all your projects will be stored by default. Specify a new folder by clicking on “Browse”. For me, I use d drive, and I will be storing my projects in a workspace called, simply, “Projects”. I do not want this dialog to be popping up everytime I run Eclipse, so I checked the relevent check box, as seen in the picture below.
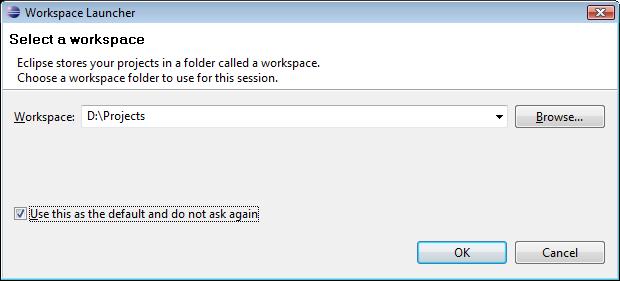
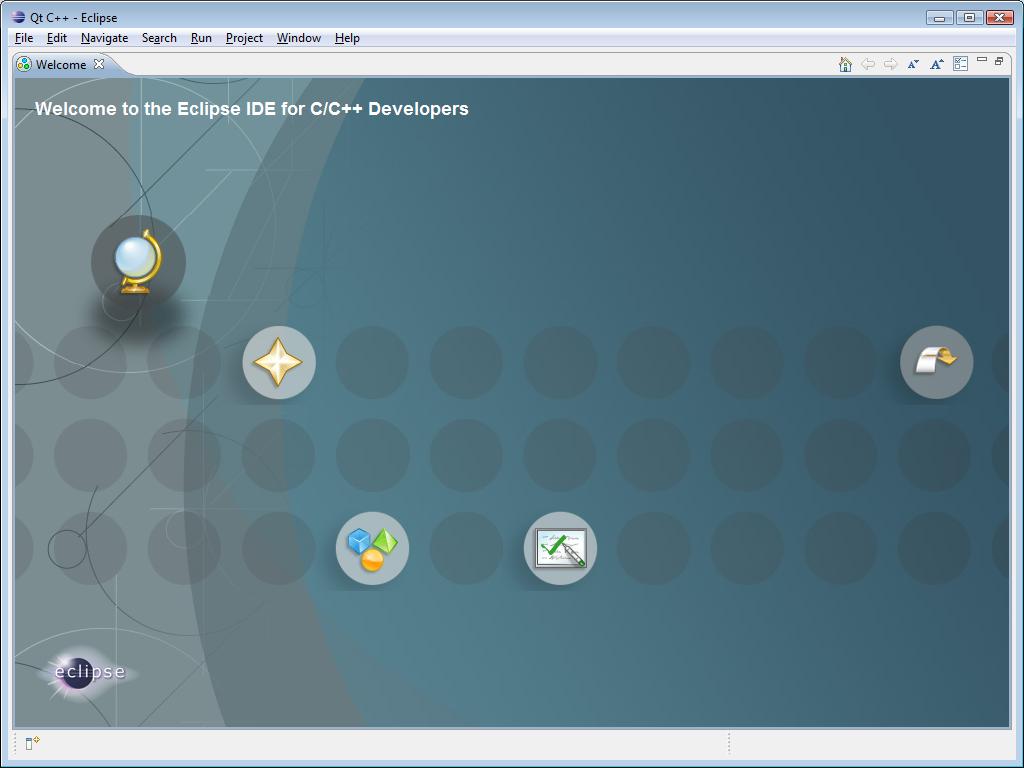
If all is well, you should be getting the following screen.
Eclipse and Qt Test
Let’s try to test Qt integration and the compiler! Follow these steps.
- Press “Ctrl” + “n” on your keyboard. This will pop up a window for you to choose a project wizard.
- Look under “Qt”. Click on “Qt Gui Project”, and click “Next”.
- Give the project a name. Call it “QtHelloWorld”.
- Click on “Finish”. You will get the following prompts.

- Click on “Open preferences”, and you will get the following.
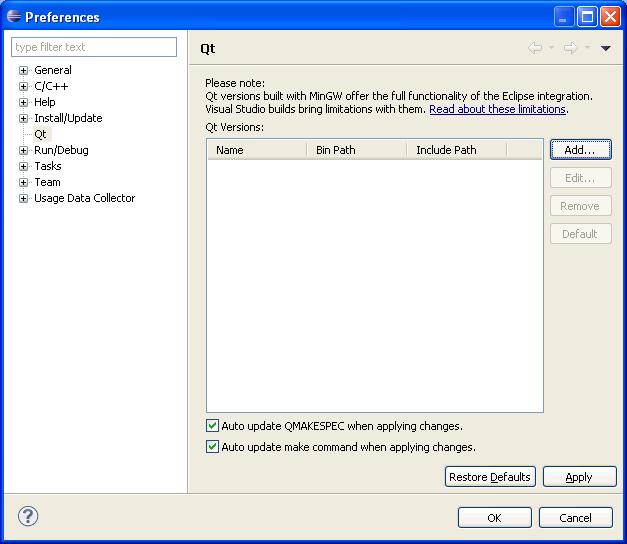
- Click on “Add…”. Enter the settings as seen in the following screenshot.
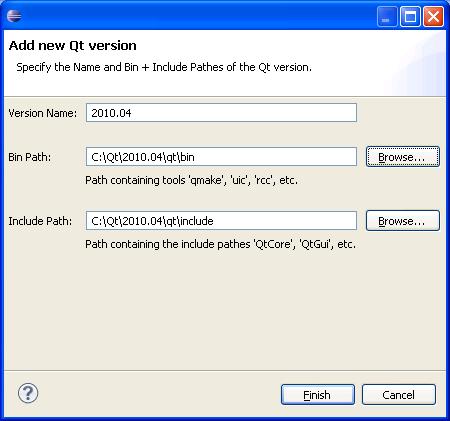
- Click on “Finish”. And then, click on “Apply”. You should get the following prompt. Just click “Yes”.

- Click on “OK” in the “Preferences” window, and close the welcome screen by clicking on the “x” at the top left corner.
- You should see the project “QtHelloWorld” in the Project Explorer. If you do not see the Project Explorer, go to “Window” –> “Show View” –> “Project Explorer”.
- Click on the arrow beside the project name to expand it. You should see a list of folders and files. These are all the files related to your project. Double click on “qthelloworld.ui”. The Qt Designer Editor should appear in the middle. This is your UI layout, ready for you to edit.
- If the Qt Widget Box is not being listed as one of the tabs on the left, go to “Window” –> “Show View” –> “Other…”. Look under “Qt”. Select “Qt C++ Widget Box”, and click “OK”. The widget box will be listed as one of the tabs on the left. Click on it.
- From the Widget Box, drag a label into the Qt Design Editor. Click on the label, and look at its properties in the properties pane on the right. Look under “QLabel” for a field called “Text”. Change its value to “HELLO WORLD!!!”.
- Resize the label in the editor so that the phrase can be seen in full.

- Save the changes by clicking on the save button.
- Click on the “Run” button at the top (the green arrow). You should get the following prompt. Choose “gdb/mi”, and click “OK”.
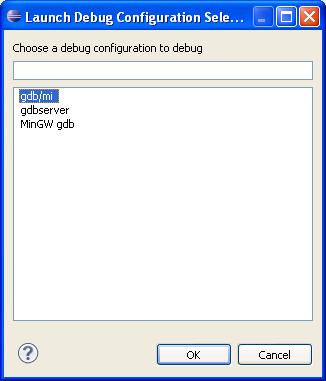
Got it? You should get your very first software up and running!
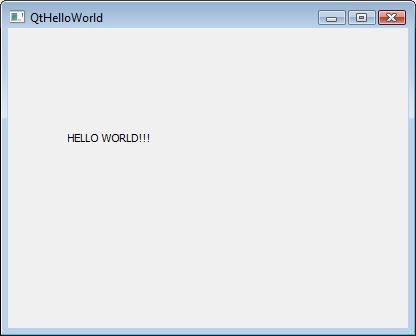
Yes, congratulations on your successful installing of Eclipse with Qt! Have fun playing with the IDE! If you encounter any problem with the setup, feel free to drop me a comment. I will try my best to help if possible.
Next, I will be writing a small tutorial on C++ basics. In the meantime, there are some books out there which might be helpful for you to start learn or revise on C++. So, hop down to the library near you, and start learning!
